Prose basics
Prose.io is an online content editor you can use to create & edit posts on the Petting Zoo's website. You can, actually, edit your content right here on Github if you'd like, but you'll probably find Prose easier and friendlier as a writing environment.
To start using Prose, first you'll need an account on Github with "contributor" status for the Petting Zoo website repositories. If you have that, you'll see the repository on your Github homepage/profile page when you log in.
All set? Let's dig in:
- Go to http://prose.io in your favorite browser.
- You'll see a prompt to authorize your account on Github, allowing Prose to access the repositories in your account. You may need to re-enter your password.

- Once you're logged in, you'll see a screen looking something like this:
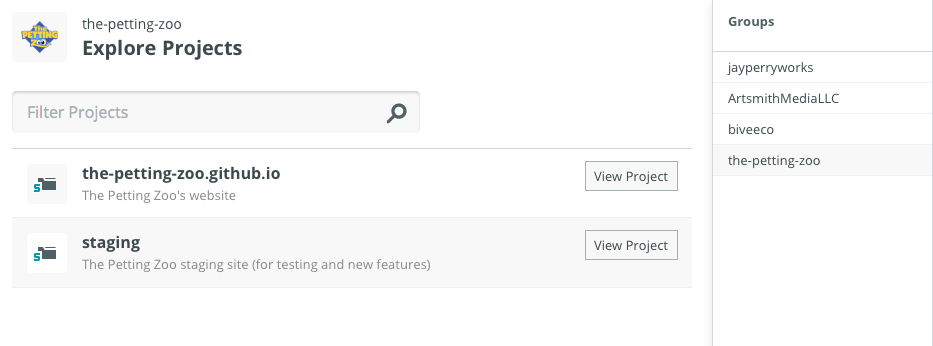
Your screen may look slightly different. You may not see any projects listed in the middle. That's okay: the Petting Zoo repositories are owned by the Petting Zoo "group" and are accessed there. If you look to the right of your screen, there's a sidebar that says "Groups." Click on "the-petting-zoo." (Not seeing it? Check to make sure you have contributor access.)
Note that this screen shot shows an account with membership in several groups. You probably won't see the others on your screen, but you only need the Petting Zoo one.
The live site is listed in Prose as "the-petting-zoo.github.io", which is a special name required by Github for an organization website. When you click on that, you'll see a list of directories:
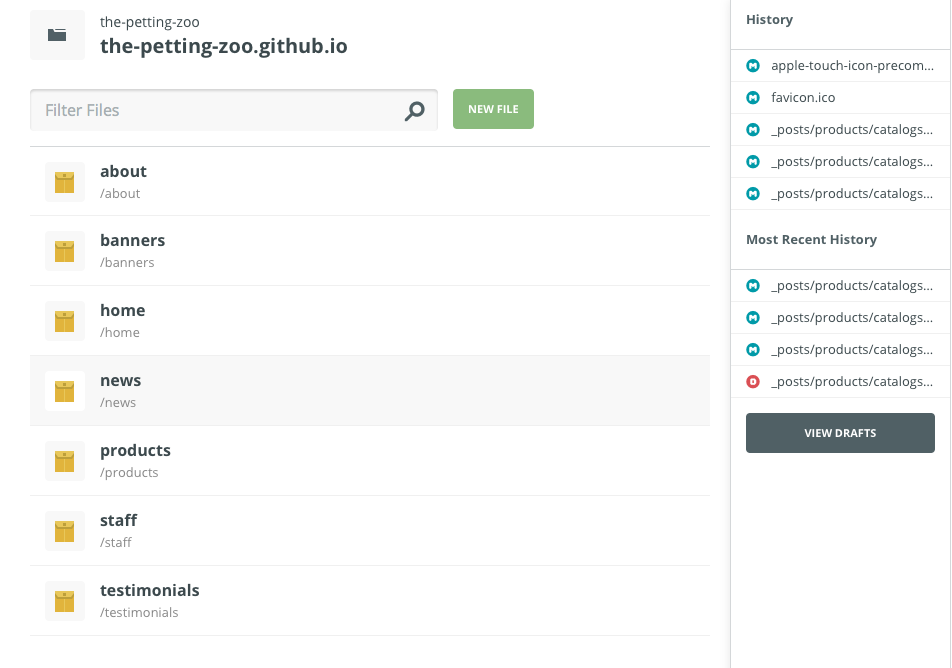
Each directory ("about", "banners", etc.) holds a specific kind of content the site uses. You can navigate through the directories more or less exactly as you would on your computer's operating system: click on a folder to see what's inside it. Each file in these folders is called a "post" and holds one particular piece of content for one particular area of the site.
The sidebar on the right shows the repository's 'history', or most recent changes. This can be useful for navigating quickly, for example, to a post you created yesterday that you want to revise.
Also, you can find a particular post very quickly using the search bar just at the top.
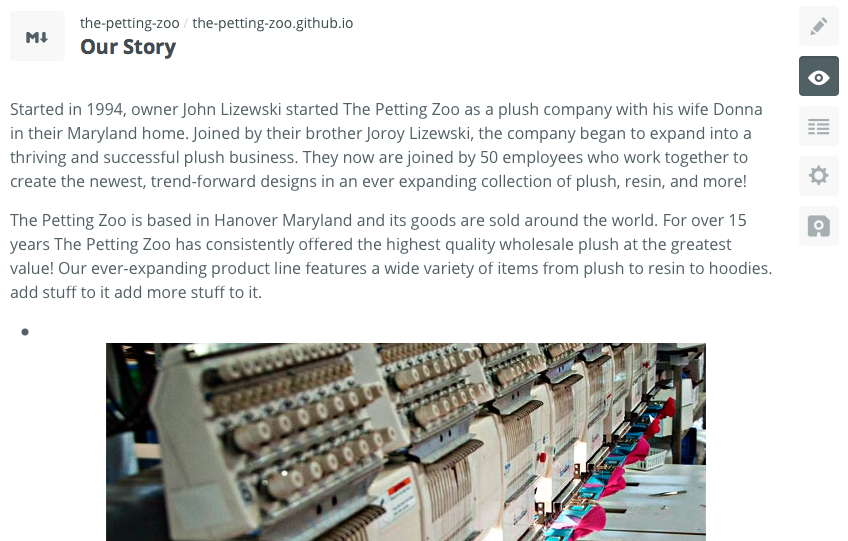
As an example, click on the first folder: "about." You probably won't be astonished to hear that this holds content for the "About" page on the website. There's just one post in there, 2014-02-26-about.md:
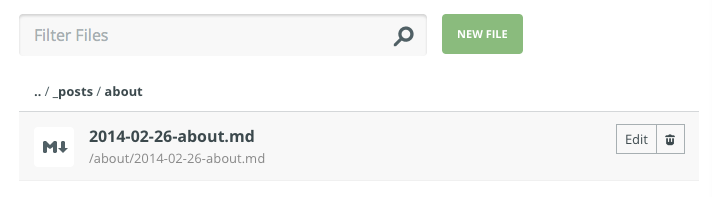
Note that, just above the list of posts, there are "breadcrumbs" ("../_posts/about") to help you see where you are in the directories. "_posts" is the main list of content folders (about, banners, etc.) you see when you open the project in Prose.
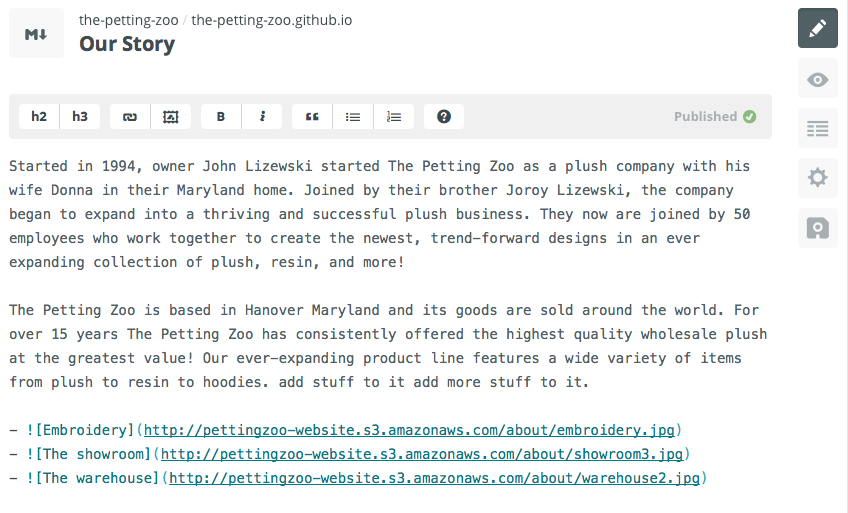
Click on the post in the about folder. You'll see a screen with the contents of the "Our Story" page:
On the right of the screen, there's a menu of icons:
These are tabs for the various "modes" of Prose. The top one (where we are now) is for editing the content of a post. The next one ("preview"), shows a basic preview of your Markdown formatting. Next is metadata (information about a post), options (drafts, delete, etc.), and commit.
The Prose editing screen looks an awful lot like a word processor, and you can use it the same way. To edit the post title, click on "Our Story" at the top and type something different. To edit the body text, again, just click and type where you'd like to add or change something.
Posts in Prose (and Jekyll, the website's engine) are written in Markdown format. Here, on the about page, you can see 2 paragraphs of copy and, just below, a bulleted list of images. (Note the image's URLs are from The Petting Zoo's Amazon S3 server - more about that later).
Near the top of the screen, there's a toolbar to help you add basic formatting, much like Word or Pages. If you forget a Markdown symbol, the "?" button on the right will bring up a simple cheat sheet.

This shows a basic preview of the Markdown formatting you've written. Note this is not a preview of the website itself but just a way to verify that your Markdown is rendering correctly (i.e. paragraphs, headers, lists, etc. are showing up) and that things are appearing in the order you intended.
Unfortunately there's no good way to actually preview a post in the context of the website before you publish it. However, if the markdown and metadata on your post are set up right, the site will translate everything to the correct styles and location(s). If you publish a post and notice a mistake once you look at it on the live site, no worries! Just go back to Prose, make your corrections, and re-commit. (See below for more details on that)
Besides the editing screen, metadata is the most important part of the post. Metadata is used extensively on The Petting Zoo's site to control where posts appear and how they're organized. Each bit of information in the metadata is called a "field."
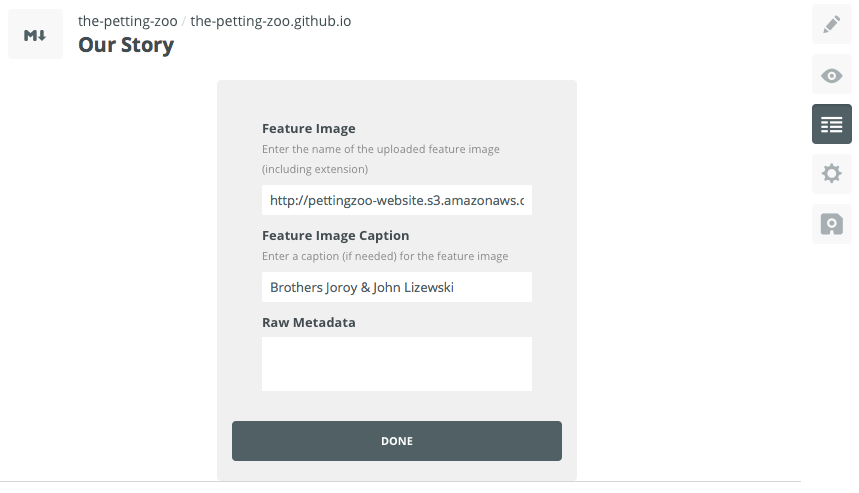
In Prose, the metadata for each post appears as a simple form you can fill out. Note that each field in the form has a label as well as a short explanation below to help you remember what you need to enter there.
In the case of the about post, there's only 2 fields: Feature Image and Feature Image Caption.
The "Our Story" page features a big "hero" image at the top (in this case showing Joroy & John). You can edit that image and its caption here.
- Feature Image is the URL (from TPZ's S3 server) of the image displayed
- Feature Image Caption is, of course, its caption.
Each type of post in each main directory has its own set of metadata. We'll go through each one later in this Wiki, but for the most part they're relatively straightforward.
This tab allows you to perform various actions on the file itself: create a draft, change its path (the directory it's in), or delete it entirely.
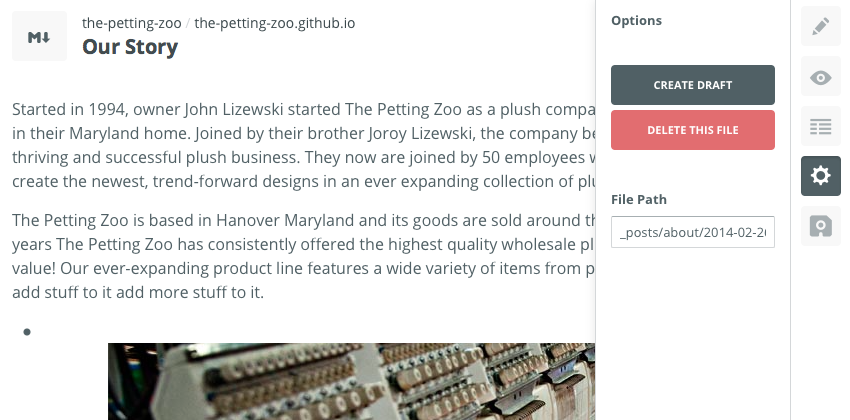
Every new post created in Prose is a "draft:" that is, a post that is hidden from the actual website, so you can continue editing and revising as needed until you're ready to "publish" it. You can, likewise, convert a live post to a draft if you'd like to pull it off the site temporarily. Drafts are only visible in Prose and on Github.
The "File Path" field in the options tab is pretty straightforward: it's a text box with the path written out. The "path" of a file is simply the list of folders it's stored in. For instance, the about post's path is:
_posts/about/2014-02-26-about.md
That means it's inside the "about" folder, which is inside the "_posts" folder.
If we'd like to move this post, say, up a level, to the _posts folder, we would change the path to:
_posts/2014-02-26-about.md
There's also a trick with the File Path field that's really useful: you can use it to create entirely new folders. If, for instance, we wanted to move this posts to a new folder called "completely-new-folder", we would just change the path to:
_posts/completely-new-folder/2014-02-26-about.md
...and a new folder in _posts would be created in your repository containing this post.
Note: Github is not able to see or manipulate empty directories. Since the about folder only contains one post, if we moved the about post to a new folder, the about folder would then disappear. Since it would be empty, this isn't a problem, but it can be startling if you don't know why a folder vanished all of a sudden.
This is also why you can only create new directories via this File Path box. A "new folder" button would be awfully convenient, but Github can't make a folder unless it has something to put there first. So, you have to change the path on a post to create a folder.
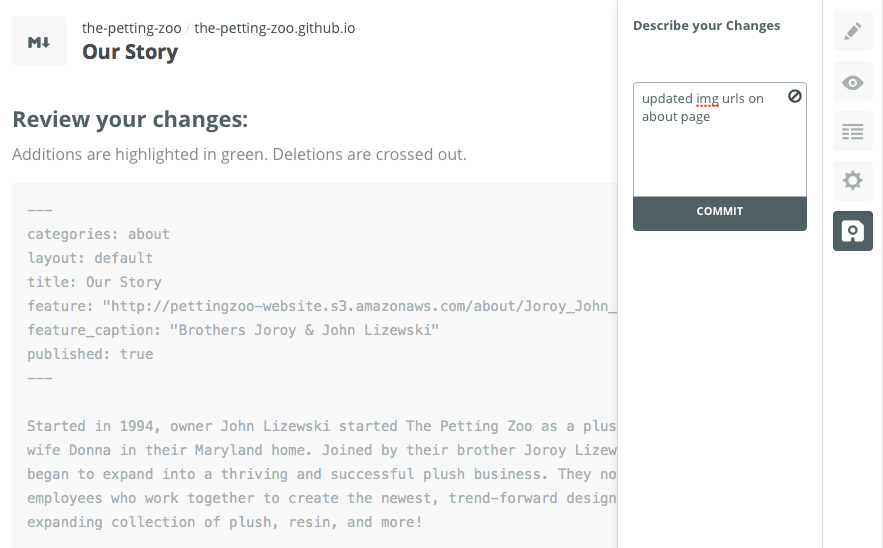
Finally, when you're done editing your post's content, path, and metadata and you're ready to save, click on this tab.
This is a Git repository, so "saving" is actually a bit different than, say, saving a file on your laptop. It's called "committing your changes." It's effectively the same thing, but instead of completely replacing your file (as you would during 'save'), a "commit" stores a new version of your file in addition to all the previous versions that might exist. If you've changed a post 20 times (and therefore made 20 commits), that means there are now 20 versions of that post in the repository, stored in a kind of timeline.
This is nice, because it means you can't break anything in Prose that can't be recovered: the old versions of everything are preserved.
So, to commit your changes to your post, just hit the "commit" button.
It's helpful, often, to add a short description of what you changed; these comments can be useful for keeping track, later, of what you've done and where. You can add the commit comment in the text field just above the button. Note that Prose has a default comment it will use if you don't type anything.
Yay! You've now edited your first post. That's all there is to it. Now, let's make an entirely new post.
To create a new post, navigate to the directory where you'd like the post to appear and click the green "New File" button at the top.
As an example, let's create a new item on the "News" page. Navigate to the "news" folder:
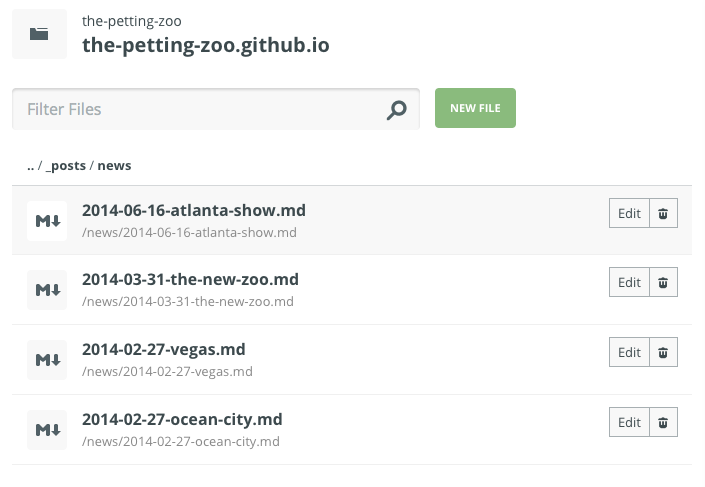
... and click "New File." You'll see a blank post screen:
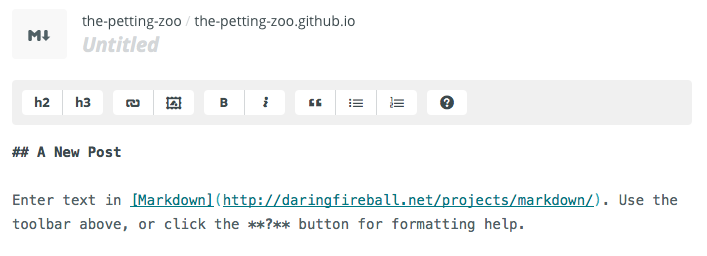
You can edit this just as you would an existing post. Prose gives you some example text in the body area, and there's an Untitled placeholder for the title.
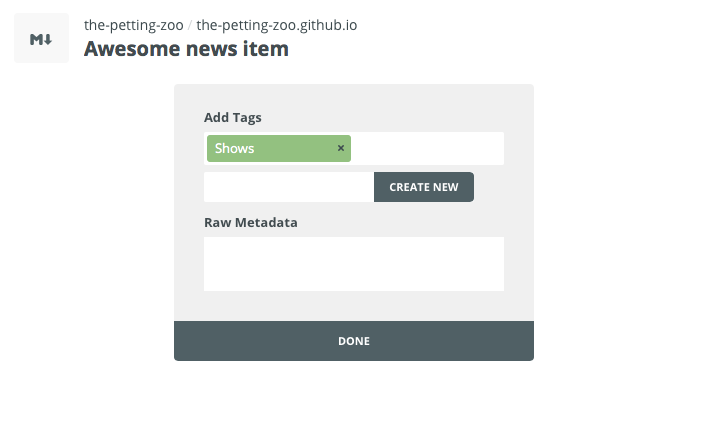
The correct metadata fields are set up automatically for the folder where you created the post. Since we created our post in News, there's a field to add some tags to our story:
When you're ready to save (commit), Prose helpfully sets up the filename correctly for the Jekyll engine to read. Jekyll requires that all posts are named with the date followed by the title: YYYY-MM-DD-title.md
Prose does this automatically with the current date and the title you entered in the editing tab.
Note: All new posts created in Prose are marked as Drafts. That is, your new post will not automatically show up on the website. Instead, you need to reopen it and click Unpublished in the toolbar:

And it will change to Published:
Now you can click on the save tab. Once you've committed again, the post will be published and will appear on the website.
This can be annoying sometimes, if you're trying to work fast and create a few posts at once, but otherwise it's a nice safety check that gives you a chance to look over what you've done before pushing to the live site.
Done! Now you're up and running with Prose.